Extra Credit 1
Due by 11:59 PM on Monday, December 2, 2019
Task 0: Getting started
For this extra credit (worth 2% on your final grade), you’ll learn blogdown, an R package that enables building websites through Hugo, a web framework. Like shiny, blogdown enable you to use a more complex framework (i.e., Hugo) but through R functions and syntax that you’ve been learning about all semester.
I recommend running this exercise on your personal laptop, mainly so you’ll have this blog site already saved on your own personal computer.
For this, we’ll primarily be using Xie, Thomas, and Hill’s blogdown book. This is a long book and should be used as more of a reference than read from beginning to end.
Task 1: Read Chapter 1
First, read Chapter 1 from Xie, Thomas, and Hill’s Blogdown book.
Task 2: Build your site
Following Section 1.7, we’ll build a website:
Create a new R Project.
install the
blogdownpackage.Run
blogdown::install_hugo()to install Hugo, which is the complementary web framework.Check that Hugo was correctly installed by running
blogdown::hugo_version(), where you should get‘0.55.1’.Go to Tools > Project Options and select:
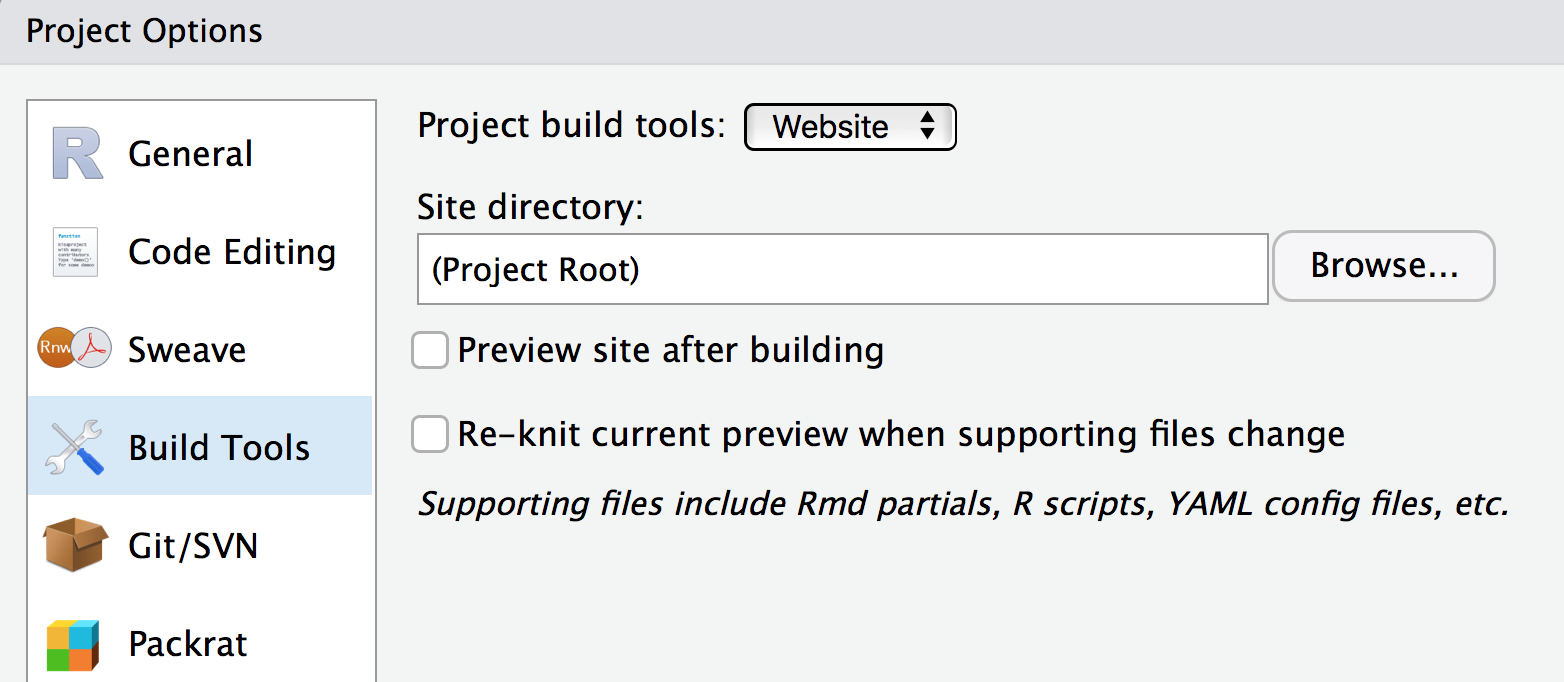
Select a Hugo theme
Build your website with the code:
blogdown::new_site(theme = 'user/repo')
This will likely create a file pop up. Save that file as a template. It should be saved in the content/post folder.
Task 3: Modify the config.toml file
In Hugo, the most important file is the configuration file: config.toml.
Read Chapters 2.1-2.2 to understand the basics of the file structures.
You should now see these files. Open config.toml.
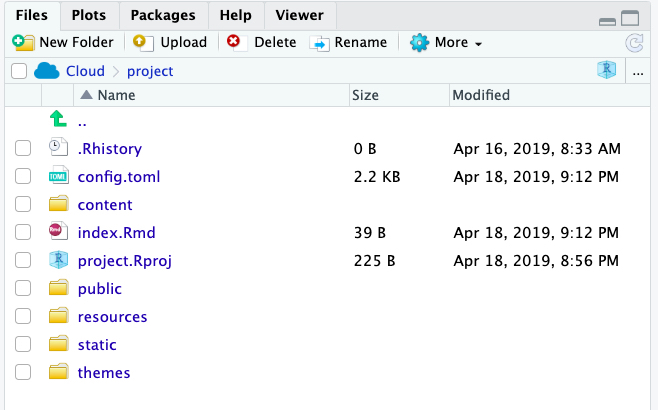
- Change the title,Think of a creative title name or just say “My Blog”. You can always edit it later.
author name, color, homeSubtitle, and modify the social network (free feel to remove, add, or modify). Provide whatever names you want.
Task 4: Create content and write your first post
To create new pages, you’ll use RMarkdown. The key is the location of the files.
Create a new post by clicking on the Addins button:
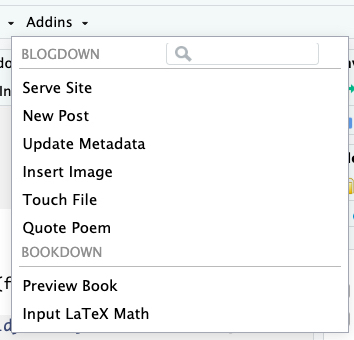
and choose “New Post”.
Give your post a title, your name, and fill in tags (what can be searched) or other fields. Keep the subdirectory to “post”, this is where the file will be created.
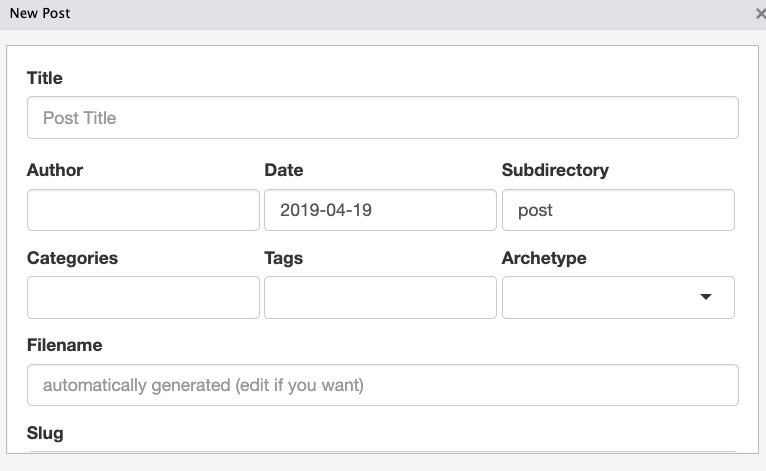
Modify the file to a .Rmd file at the bottom before creating the file.This chapter describes the difference between a markdown and Rmarkdown file.
Now open that new .Rmd file in RStudio to modify.
To finish, add in whatever you want! Code, data, plots, whatever. Simply write at least 100 lines of content.
Task 5: Serve your site
You’ll need to serve your site by updating it. Think of this as Knitting all possible files.
To do this, you’ll need to click “Addins” again and click “Serve Site”.
To learn more, see the 2nd section of this chapter.
Task 6: Read through Chapter 2
Next, read through the rest of Chapter 2, especially section 2.7 on static files. This is the location where you can put files (e.g., images, pdf, gifs).
Task 7: Deploy to Netlify
The simplest way to deploy your website is to put it on Netlify through drag and droping the contents of your /public folder.
To do this follow Allison Hill’s Hugo Troubleshooting steps.
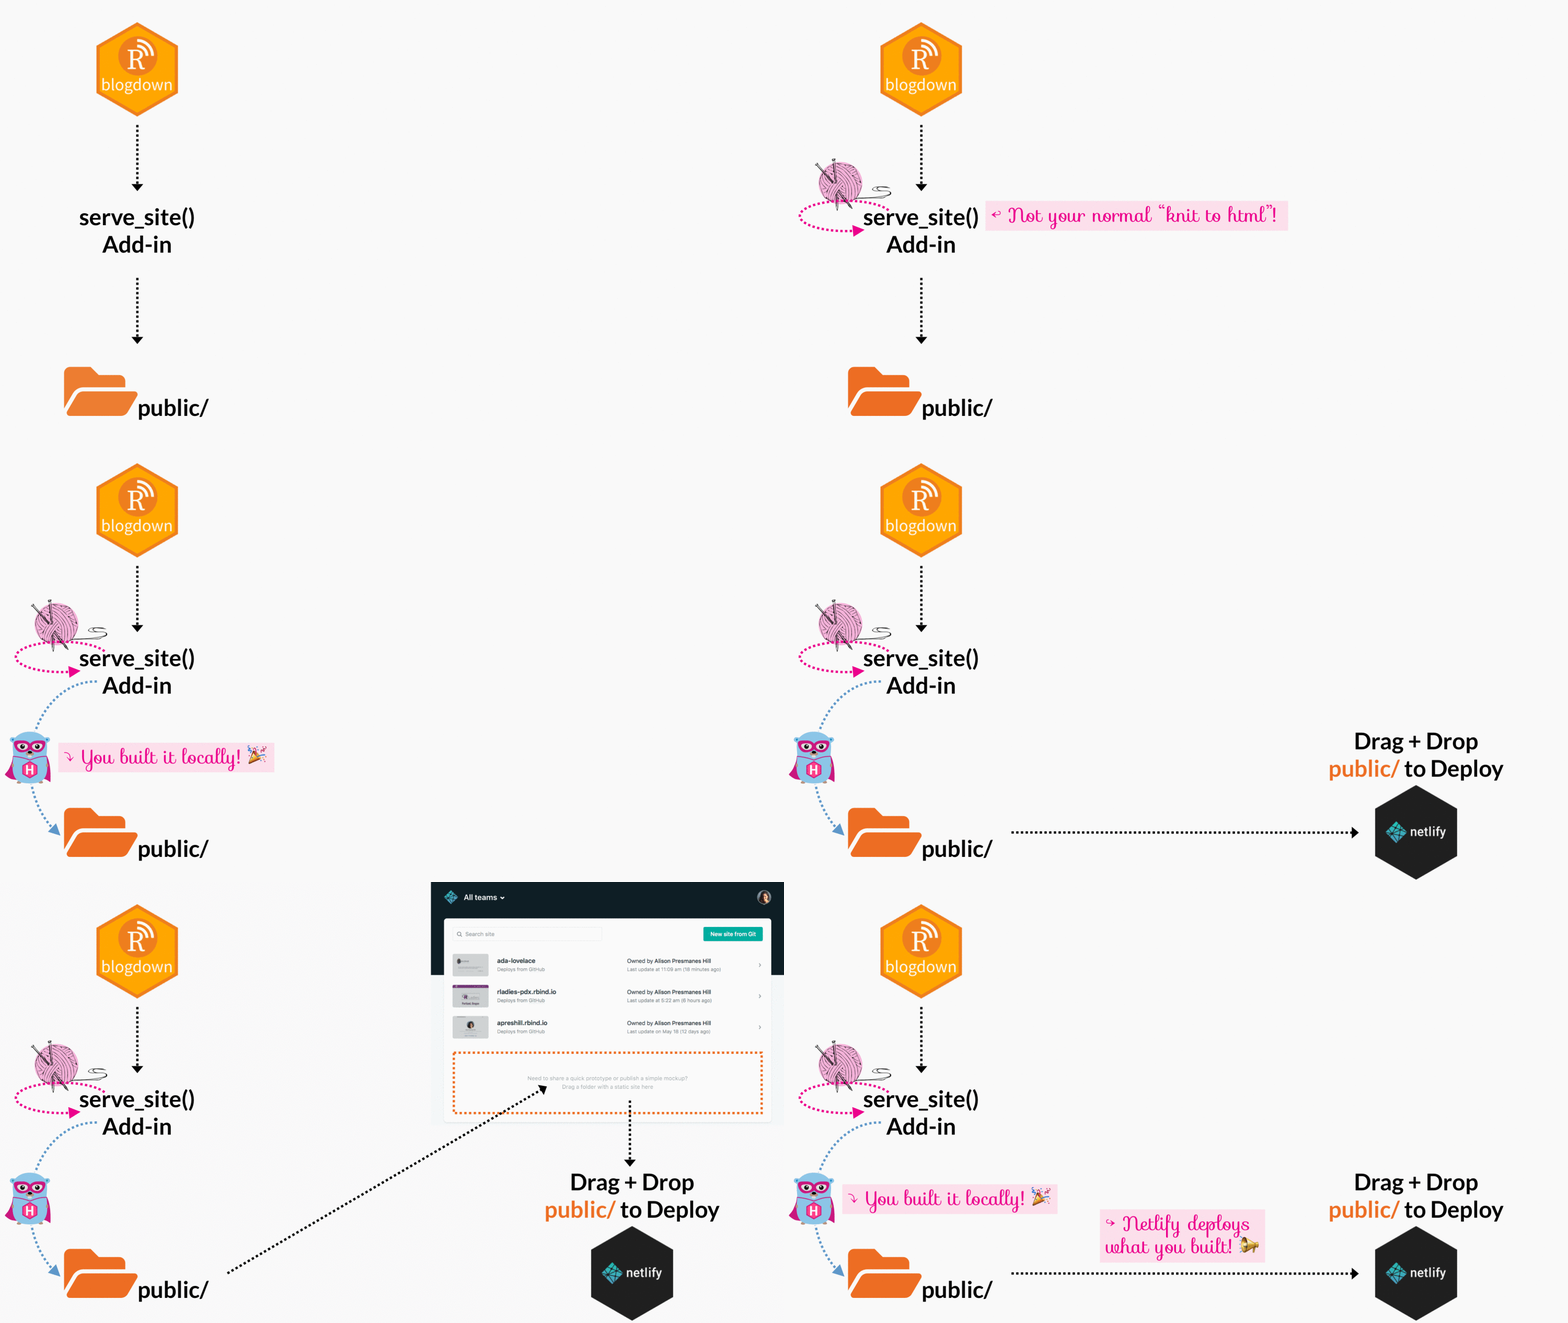
Task 7 (alternate, optional): Deploy to Netlify via GitHub
For this task, you’ll need to learn GitHub. You’ll first need to create your own GitHub account as well as follow additional steps.
Follow the instructions by Allison Hill in her post: Up and Running with blogdown.
Note! Her blog is assuming using a Mac. While Windows users are welcome to try, the problem comes in with terminal (UNIX command line).
I’d highly recommend Jenny Bryan’s Happy Git With R. But remember, learning GitHub can be challenging at first. This is why if you decide to do this task, be prepared to work with someone who can help you.
What to provide for credit
To get extra credit, you need to DM on Slack (no emails please) your netlify website page link. Your site must be operational.
Note the deadline is midnight by the final exam, 5:59pm on Monday, December 9. I will not take extra credit after that point, i.e., grades need to be finalized.
Help
For further help, check out these posts:
Amber Thomas’ Making a Website Using Blogdown, Hugo, and GitHub pages.This is a great overview of using blogdown, hugo, and GitHub; however, this post is from December 2016 and may not be 100% up-to-date with recent changes to packages. Therefore, you may have issues if you implement but the general descriptions are a great overview.
Garrick Aden-Buie’s A Blogdown New Post Workflow with Github and Netlify
Allison Hill’s Blogdown Workshop Slides.
If you’re having issues with Netlify, check out Allison’s recent blog post.